southern inspiration: biscuits & mac

Last week, I celebrated my friend’s bachelorette party in my favorite city: Nashville, TN! From spending a night at Tootsies to doing yoga with goats and sipping on the sommelier’s best recommendations at Belle Meade Winery, I was able to visit so many new places in Music City on this trip. Nashville has so much to offer, and it truly never disappoints! Check out my travel guide for Nashville if you want to read about some of my favorite experiences so far!

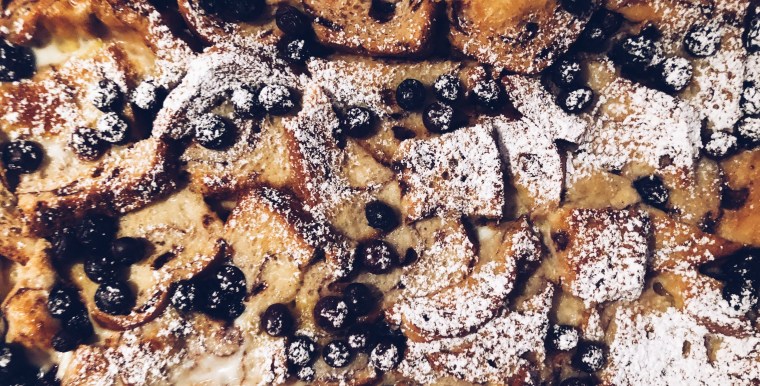
One of the best parts about Nashville is the amazing food you can find anywhere you go in the city! I have been craving some southern comfort foods ever since I got back, so I decided to share my favorite recipes for homemade biscuits and mac & cheese! Hopefully these recipes help you feel like you are chowing down in the south!

Buttery Biscuits
• 3 cups of all-purpose flour
• 4 tsp of baking powder
• 3 tbsp of sugar
• 1/2 tsp cream of tartar
• 1/2 tsp of salt
• 3/4 cup of butter, cold, plus additional butter to melt
• 1 cup of whole milk
• 1 egg

Preheat the oven to 450°.

Prepare the cold butter by cutting it into small squares so that it is easier to work into the biscuit dough. Keep the butter in the fridge until it is needed.

Combine all dry ingredients into a large bowl. Then, incorporate the cut butter into the dough. Small pieces of butter should show through the mixture.

Add in the milk and the egg, and mix it together to combine. The dough will have a sticky feel, and the butter pieces should still be visible.

Flour a surface where you can roll out the dough. Sprinkle additional flour on the dough and knead it — add more flour to reduce stickiness if necessary.

Roll the dough until it is about 1 inch thick to cut into round pieces. If you do not have a biscuit cutter, you can use the rim of a glass (it makes a perfect circle every time!).

Once the biscuits are cut, place them on a baking sheet lined with parchment paper. Melt down butter and brush the tops of the biscuits before putting them into the oven.

Cook for 10 to 15 minutes, until golden brown. For an extra buttery taste, cut the biscuits open before they cool and place a small square of butter inside to melt before serving!

Mac & Cheese

• 1 box of large elbow macaroni
• 1/4 stick of butter, melted
• 1 small onion, finely chopped
• 2 1/2 tbsp of flour
• 2 cups of milk
• 1 tsp of Worcestershire sauce
• 1/4 tsp of dry mustard
• 4 cups (or 1 bag) of Sargento 4 Cheese Mexican blend
• Breadcrumbs (Panko or Plain!)
• Salt and pepper, for taste

Preheat the oven to 350°.

Boil a pot of water and cook one box of shell pasta. Once the pasta has been cooked and drained, sauté the onion over medium heat.

In a large bowl, add the pasta, melted butter, onion and flour. Then, pour in the milk slowly.

Add the Worcestershire sauce, mustard, salt and pepper.

Mix all ingredients, and add in the shredded cheese. Transfer the mix to a pan for baking and top with breadcrumbs.

Cook for 30 minutes, covered. Once done, sprinkle some extra breadcrumbs on top. Serve and enjoy!

red, white & baking for the 4th

Bring on the parades, parties and fireworks! Tomorrow is the 4th of July, and I am so excited to spend the day with family and friends, honoring this country, our freedom and those who have fought so hard to protect America and its people.

My family has been hosting a party on the 4th of July for as long as I can remember, and it is definitely one of my favorite family traditions. The celebrations kick off tonight with a sleepover at my parents’ house before walking up the block to my town’s parade the next morning. After the parade, we switch into complete party-mode! From making sure the flag is waving proudly to constructing a menu of foods that everyone can enjoy, it truly takes a village! With a full night and day planned, the easier the menu items are to make, the better!

One of my favorite desserts to make for parties is a trifle dish — and no, I am not talking about Rachel’s English Trifle; I am talking about my Stars, Stripes & Trifles dish! It only requires six ingredients, a trifle dish and a knack for stacking! Read on for how you can make this dish to bring to your own 4th of July BBQ!
Note: I used a small trifle when constructing this dish. 1 cake mix will be good for a large trifle, but you may need to double the rest of the ingredients!


Stars, Stripes & Trifles

Ingredients
• Yellow Cake Mix
• Vanilla Pudding
• Cool Whip
• Fresh Strawberries (large container)
• Fresh Blueberries (large container)
• Jar of Cherries (1 large)

Directions

Bake the yellow cake mix according to package instructions; let it cool completely before assembling dish.

Once cake has cooled, cut into small pieces. Layer the cake, covering the entire bottom of the dish.


Spoon in vanilla pudding on top of the cake, completely covering it.

Cut strawberries into quarter inch pieces and layer to cover the pudding layer. I double-stacked strawberries here!


Add a layer of cool whip to cover the strawberries.

Layer blueberries on top of the cool whip layer.

Repeat the layering process until almost at the top of the trifle dish — cake, vanilla pudding, strawberries, cool whip, blueberries. Keep in mind that the point of the dish is to showcase the red, white and blue stripes layered throughout, so try not to put too much pressure on each layer as you are adding on, otherwise the layers will merge together.

Once the dish is almost filled to the top, cover the final layer with cool whip.
Note: Try to use cake or strawberries as the final layer, as blueberries will be used on the top of the dish.

Use the jar of cherries to decorate the rim of the trifle. Be sure to dry the cherries before placing them on the cool whip layer to avoid the juices dripping down the dish.

Once the cherries cover the entire outer rim, fill in with blueberries.

Keep the dish refrigerated until ready to serve.


God Bless the USA — and trifle dishes! I hope you enjoy this patriotic twist on dessert! Happy 4th of July everyone!

chicken stir-fry

3a3c5fa4-14ec-4bb2-a842-6589132180e5.jpgQuick, easy dinners are my favorite; especially because I tend to cook most of my meals in the mornings before I have to be at work. This chicken stir-fry dish is tasty, healthy and simple to make! Plus, this recipe is great for two, with plenty for leftovers! Happy cooking!

Ingredients:

  • 1 to 2 tablespoons of olive oil
  • 2 large boneless, skinless chicken breasts, diced into bite-sized pieces
  • 1 white onion, diced
  • 1 green pepper, diced
  • 1 red pepper, diced
  • 2 tablespoons of chicken broth
  • 2 tablespoons of soy sauce
  • 2 tablespoons of rice vinegar
  • 2 tablespoons of cornstarch
  • 1 tablespoon of orange juice, no pulp
  • 1 teaspoon of ground ginger
  • 1 teaspoon of black pepper
  • 1/2 teaspoon of salt
  • 1 bag of brown or white rice

014e6ce6-aa5e-43eb-acd8-08b63b025b66.jpgAdd the olive oil to a skillet over medium heat, then add in the chicken and sauté for four minutes. Remove the chicken, and add in the onion. Once the onion is translucent, add in the peppers. Cook the peppers and onion for three minutes before adding the chicken back in.

Processed with VSCO with a5 presetIn a bowl, whisk together the chicken broth, soy sauce, rice vinegar, cornstarch, orange juice, ground ginger, black pepper and salt. Once combined, pour over the chicken, peppers and onion. Continue to cook for eight more minutes.

In the meantime, cook one bag of brown or white rice, depending on your preference, and add it to the stir-fry once it’s done. Mix everything together, and enjoy!

simply local: french baking

IMG_8061It was a quiet Saturday morning in Sur La Table, except for the whirring of a food processor and the clanking of the Kitchen Aid Stand Mixer as dozens of macarons were being prepared in the kitchen.

Connor and I signed up for our first baking class together, and we had such a great experience. We were lucky to be two of five members of the early morning Valentine’s Day-themed macaron-making class. Our chef for the day welcomed us and showed us a demonstration of exactly how to prepare our macarons, and then we were on our own to re-create the recipe.

The instruction was informational and thorough, and our chef was standing by in case we had any questions. We learned the proper way and order in which to mix our ingredients to create our macaron shells, how to properly pipe the macarons and how to make our own fillings — champagne buttercream and chocolate ganache with strawberry jam!

IMG_8062The macarons were absolutely delicious, and it was such a fun date for Connor and I! We loved trying something new together, and we are excited to try making them again on our own!

If you are interested in making your own macarons, combine these five simple ingredients to make 35 sandwich cookies, and fill them with your favorite type of filling!

  • 4 oz of almond flour
  • 7 oz of confectioners’ sugar
  • 4 oz of egg whites, room temperature
  • 1/8 tsp of cream of tartar
  • 3 1/2 oz of granulated sugar

Preheat your oven to 300º.

Combine the almond flour and confectioners’ sugar until blended (either in a food processor or mixed in a large bowl). Sift the mixture and separate it into thirds.

Using a Kitchen Aid Stand Mixer, pour in your egg whites and add the cream of tartar directly in the middle to start making your meringue. On a medium speed, start to slowly add in your granulated sugar. Continue to whip until you reach a stiff peak. Note: If you are going to add food coloring into your mixture for your macarons, add it in between medium and stiff peak of the meringue.

Then, take a third of the flour mixture and fold it into the meringue mixture. Once it has been combined, pour in the rest of the flour mixture and continue to fold it into the meringue. Combine until it is glossy and the batter reaches the consistency of a brownie batter.

Pour your mixture into piping bags and pipe with a plain, round tip onto your baking sheet. These cookies should be about the size of the bottom of a shot glass. Be sure to keep your piping bag straight up, at 90º.

Let the macarons sit out for about 30 minutes or so, until a firm skin forms on them. To make sure they are ready to be baked, lightly graze the tops with your fingers. If there are no dents, they are ready!

Bake for about 16 minutes, rotating halfway through. Let sit and cool before removing from the pan and adding filling.

Happy baking!

breakfast with santa

Merry Christmas Eve! It is hard to believe that Christmas is tomorrow! It is no secret that I love this time of year, and no matter how old I get, nothing beats the feeling of waking up early on Christmas morning and spending time with loved ones.

Once the presents are opened and the coffee is consumed, breakfast is the next best part! Read on below for two sweet treats to make on Christmas morning!

French Toast Casserole

This French Toast Casserole from Savory Magazine is been my go-to breakfast for the holidays, and it is too good not to share! The recipe is just five ingredients, and you can even prep it overnight and pop it in the oven first thing in the morning!

9B29D753-CA6F-48FC-B08D-3D66EC75D80D-e1545662651335.jpg

Ingredients
1 loaf (16 oz) of cinnamon swirl bread (Pepperidge Farm)
¾ of a container of blueberries
5 eggs
2 ½ cups of half and half
1 tsp of vanilla extract

  • Cut the entire loaf of bread into approximately 1-inch pieces. Use a 13 x 9 non-stick pan and lay the cut pieces of bread across the bottom. Once the bottom is covered, continue to layer the bread on top of itself until the full loaf is in the pan.
  • Scatter the blueberries over the bread.
  • Mix the eggs, half and half, and vanilla extract in a large bowl, and pour the mixture over the bread and blueberries.
  • Let sit in the refrigerator overnight or one hour prior to cooking.
  • Preheat the oven to 350º. Cook the casserole for 50 minutes.
  • Sprinkle powdered sugar over the top and serve immediately!

Pop’s Pancakes

Growing up, my dad always made pancakes for my family on Sunday mornings, and whenever possible, Connor and I continue that tradition for ourselves! Pop’s Pancakes are a twist on the classic Aunt Jemima recipe. His modifications create a much thinner pancake — perfect for stacking on your plate!

IMG_5881.jpg

Ingredients
1 cup of Aunt Jemima Pancake Mix
1 cup of milk
1/2 cup of half and half
1 egg
1 tbsp of vegetable oil

  • Mix all ingredients into a bowl and whisk until the batter is smooth.
  • Preheat the griddle to 350º and coat with a little butter.
  • Pour batter, cook the pancakes evenly on both sides, pour on the syrup and enjoy!


breakfast in bed

This weekend, Connor and I tried out a new recipe that redefined the phrase “breakfast in bed.” While we were fast asleep, our breakfast was cooking all night long. What could be better than waking up to a nice, hot breakfast on a chilly December morning?

We used our slow cooker to make a savory casserole that was filled with some of our favorite breakfast staples: eggs, cheese and hash browns! At the last minute, we even made a game-changing decision to add in some crispy bacon! Read on below for the recipe

Ingredients

1 dozen eggs
24 hash brown patties, frozen
1/2 cup of chopped onions
3 & 1/2 cups of shredded cheddar cheese
1 package of cooked and chopped bacon (or your favorite breakfast meat) — optional!
1 cup of milk
1/4 tsp of ground mustard
1/4 tsp of garlic powder
1 tsp of salt, plus more for seasoning
1/2 tsp of pepper, plus more for seasoning

  • Whisk the 12 eggs until fully mixed. Add in the milk, ground mustard, garlic powder, salt and pepper, and whisk until all ingredients are combined.
  • In the slow cooker, start by placing the hash brown patties in as the base for the first layer. We found it best to break the patties up into halves and quarters to fit across the entire pot without too many empty spaces. Season with a pinch of salt and pepper.
  • Add in 1/3 of the onions, as well as 1/3 of the bacon over the hash browns. Sprinkle 1 cup of cheese on top.
  • Repeat this step two more times, so that you have a total of three layers of hash browns, onions, bacon and cheese.
  • Pour the egg mixture over the three-layer casserole. Then add the last 1/2 cup of cheese on top.
  • Cover the slow cooker, and set it to cook on low for 8 hours.

Go to bed, get a good night’s sleep, and wake up to a delicious breakfast casserole first thing in the morning! This hassle-free breakfast is the perfect meal for the holiday season! Bon appétit!

slow cooker apple cider


Thanksgiving is just a few days away, and I am so excited to see my family and share an incredible meal together. I have been testing out different recipes that I can bring for our Thanksgiving feast, and this slow cooker apple cider has definitely made the list. Not only does it taste delicious, but it will also make your house smell amazing while it is cooking!

7d537903-df89-44f7-833f-30627e44b07b-4-e1542606732935.jpg

Ingredients:
5 gala apples, sliced
1 orange, peeled and sliced
5 cinnamon sticks
3/4 cup of cranberries
6 cups of water

• Cut the tops and bottoms off of the apples before slicing and placing the pieces into the slow cooker. Peel and slice the orange and add it to the pot as well. Add in the cranberries, cinnamon sticks and the water, and stir.
• Cook the mixture on high for four hours.
• Once the cider has finished, mash the fruit pieces into the mixture (I used a potato masher).
• Strain the mixture through a sieve.
• Pour into cups, top with some cooked cranberries and enjoy!

Processed with VSCO with a5 preset

lemon asparagus chicken

This recipe for lemon asparagus chicken is absolutely delicious, and I could eat it every single day! It is simple to make, and it is a one-pan dish, so it makes for easy kitchen cleanup!

Processed with VSCO with a5 presetIngredients:
• 4 Boneless, Skinless Chicken Breasts
• 1 package of Asparagus Spears
• 1/4 cup of Flour
• 3/4 tsp of Sea Salt + more for seasoning
• 1/2 tsp of Pepper + more for seasoning
• 1 tsp of Minced Garlic
• 1 tbsp of Dijon Mustard
• 3 tbsp of Lemon Juice
• 1 cup of Chicken Broth
1 tbsp of Parsley Flakes
• Olive Oil

Start by mixing the flour with the sea salt and pepper to create the coating for the chicken. Take each piece of chicken and coat both sides.

Add a splash of olive oil into a skillet and cook the chicken on medium heat for about 5 minutes on each side, or until slightly golden. Make sure the chicken cooks through.

Once the chicken has been cooked on each side, remove it from the pan and set it aside.

Add another splash of olive oil to the skillet and sauté the asparagus. Add in the minced garlic for flavor.

Processed with VSCO with a5 presetWhile the asparagus is cooking, mix the dijon mustard and lemon juice together in a small bowl. Pour this mixture, along with the chicken broth, into the skillet over the asparagus. Sprinkle in the parsley flakes.

Add the chicken back into the skillet with the asparagus and season with salt and pepper. Let the broth mixture come to a boil, and then reduce it to a simmer. Cook for a few more minutes, until the asparagus is tender.

Remove from the heat and enjoy!

chocolate covered oreos

Processed with VSCO with a5 presetI have to admit, I am a chocoholic, and I have my mother to thank for that. For as long as I can remember, my mom has been making and decorating chocolate. From chocolate-covered ice skates for one of my birthday parties to bridal shower favors and holiday-themed creations, she has both a passion and a knack for this craft. Over the years, she has passed down that love of making chocolate to me. While we always love making chocolate for events or holidays, lately, our go-to has been to make chocolate-covered Oreos.

Chocolate-covered Oreos have proven to be a hit at any gathering, whether it be a work function, graduation party or holiday. Chocolate-covered Oreos take two classics — chocolate and Oreos  and combine them in a fun, delicious way for all to enjoy.

To make approximately 35 chocolate-covered Oreos, you will need the following ingredients/supplies:

  • Oreo molds (I purchased mine from a local chocolate store, but Amazon has a similar mold available for purchase)
  • 1.5 – 2 lb. of chocolate melts (I prefer milk chocolate, but use your favorite type!)
  • 1 package of Oreo cookies
  • Colored chocolate melts
  • Small squeeze bottle(s) for decorating

D8FA519E-F605-413A-932D-0B7C38FFEDD1.JPGWhen it comes to melting chocolate, my mom and I have found that melting a handful or two of the chocolate melts at a time in the microwave is the fastest and most efficient way to work. We start by microwaving the chocolate in a small bowl for 30 seconds. We then stir the chocolate, and put it in for another 15 seconds. We repeat the stirring process and continue melting the chocolate for seconds at a time until it has a nice, smooth consistency. Every microwave is different, so be careful when heating the chocolate. If you overheat the chocolate, it will burn.

Processed with VSCO with a6 preset

Once the chocolate is melted down to the right consistency, we spoon it into the molds.We have found that this process works best for us in terms of coverage within the mold. The last thing you want are cracks in the chocolate once the Oreo is submerged!

It is important to work fast when it comes to filling the molds, as the chocolate tends to harden quickly. Once you have covered the bottom and sides of the mold, add an Oreo in, and cover it with more chocolate, so that it is completely surrounded by chocolate. Tap the middle of the mold to flatten out the chocolate on top of the cookie if need be. Repeat this step until all of the molds are filled.

Processed with VSCO with a5 presetOnce that is complete, place the molds into the freezer for 20 minutes. After 20 minutes are up, remove the molds from the freezer and turn the molds over to remove the Oreos. Lightly pressing on the mold should release the Oreos easily. Place them on wax paper for decorating.

Here is where you can get creative. Melt your colored chocolate down using the same process you used for melting the chocolate for the Oreos. Once the colored chocolate reaches the same smooth consistency as the regular chocolate, put it in the squeeze bottles and have fun decorating!

Once you are finished decorating the Oreos, be sure to keep the cookies in a room-temperature environment. Putting the Oreos in the refrigerator for storage can cause them to crack, so keep them in a container on the counter until you are ready to serve!

Processed with VSCO with a5 preset

healthy shrimp tacos

I am all about fast, easy and healthy meals during the week, and this recipe for cilantro lime shrimp tacos checks all of those boxes. Try this recipe for your next Taco Tuesday!

Ingredients (serves 2 to 4 people):
• 1 bag of frozen, uncooked, peeled and deveined shrimp
• 1 large container of Greek yogurt (I use FAGE Non-Fat yogurt)
• 1 lime
• Fresh cilantro
• Cayenne pepper
• Whole wheat tortillas
• Salt and pepper for flavor

Start by defrosting the uncooked shrimp, removing the tails and rinsing it clean. Cut the shrimp into small, bite-sized pieces, and add it into a skillet with a splash of olive oil over medium heat. Season the shrimp with salt and pepper for flavor, and cook the shrimp until it turns pink. Be sure to toss the shrimp periodically as it is cooking.

IMG_5499While the shrimp is cooking, put the Greek yogurt into a bowl and combine it with the juice of half of a lime, a handful of chopped cilantro and a few dashes of cayenne pepper. Mix all of the ingredients together, and add more lime, cilantro or cayenne pepper if you feel necessary.

IMG_5507To assemble the shrimp tacos, lay out a tortilla, add the Greek yogurt mixture and top with some shrimp. Feel free to add in any other healthy toppings you may like, such as shredded lettuce, tomatoes or avocado. Share your take on these healthy shrimp tacos in the comments below or tag me on Instagram @ livingsimplygray. I hope you enjoy!